[Part 1/3] Securing APIs using JSON Web Token (JWT) in IBM API-Connect v10 using X.509 RSA key pair
Hello Tech Enthusiasts 👋,
You’re here to address the challenge of securing your APIs with JWT generation/validation policy in IBM API Connect. This series of articles will concentrate on the widely requested use of X.509 RSA certificates/keys for signing and verification. I’ll tackle this with a straightforward method, and if you have a more complex requirement, leave your comments, and I’ll craft an article for it. In part 1 of this series, we’ll generate a certificate using DataPower cryptographic tools and upload it to the IBM API Connect Manager UI. Parts-2 and Part-3 will focus on JWT generation and validation, respectively.
JSON Web Token (JWT) is an open standard (RFC 7519) that defines a compact and self-contained way for securely transmitting information between parties as a JSON object. This information can be verified and trusted because it is digitally signed. Refer JSON Web Token Introduction — jwt.io.
Also, do refer IBM Named a Leader in the 2023 Gartner Magic Quadrant for API Management — IBM Blog.
Prerequisites
- IBM API Connect — v10.0.5.x (hereafter referred as APIC)
- IBM DataPower Gateway (API Gateway) — 10.5.0.x. (hereafter referred as DataPower)
- Postman — 11.11.1: For testing JWT generation and validation. Feel free to use any testing tool you prefer.
- Certificate/Key Pair: I’ve utilized DataPower cryptographic tools to generate self-sign certificate, but OpenSSL is also an option. In case you’re using pre-defined certificate, you can ignore the step-1
Step 1: Generate Self-Sign Certificate
In BAU world, operation team does uses DataPower Crypto tools on day-to-day basis to generate CSR/key pair for CA signed certificate request other than openssl. Here are quick steps:
- Logon to DataPower web console (Prefer New UI as the existing is now deprecated. Something I’ll miss for sure!)
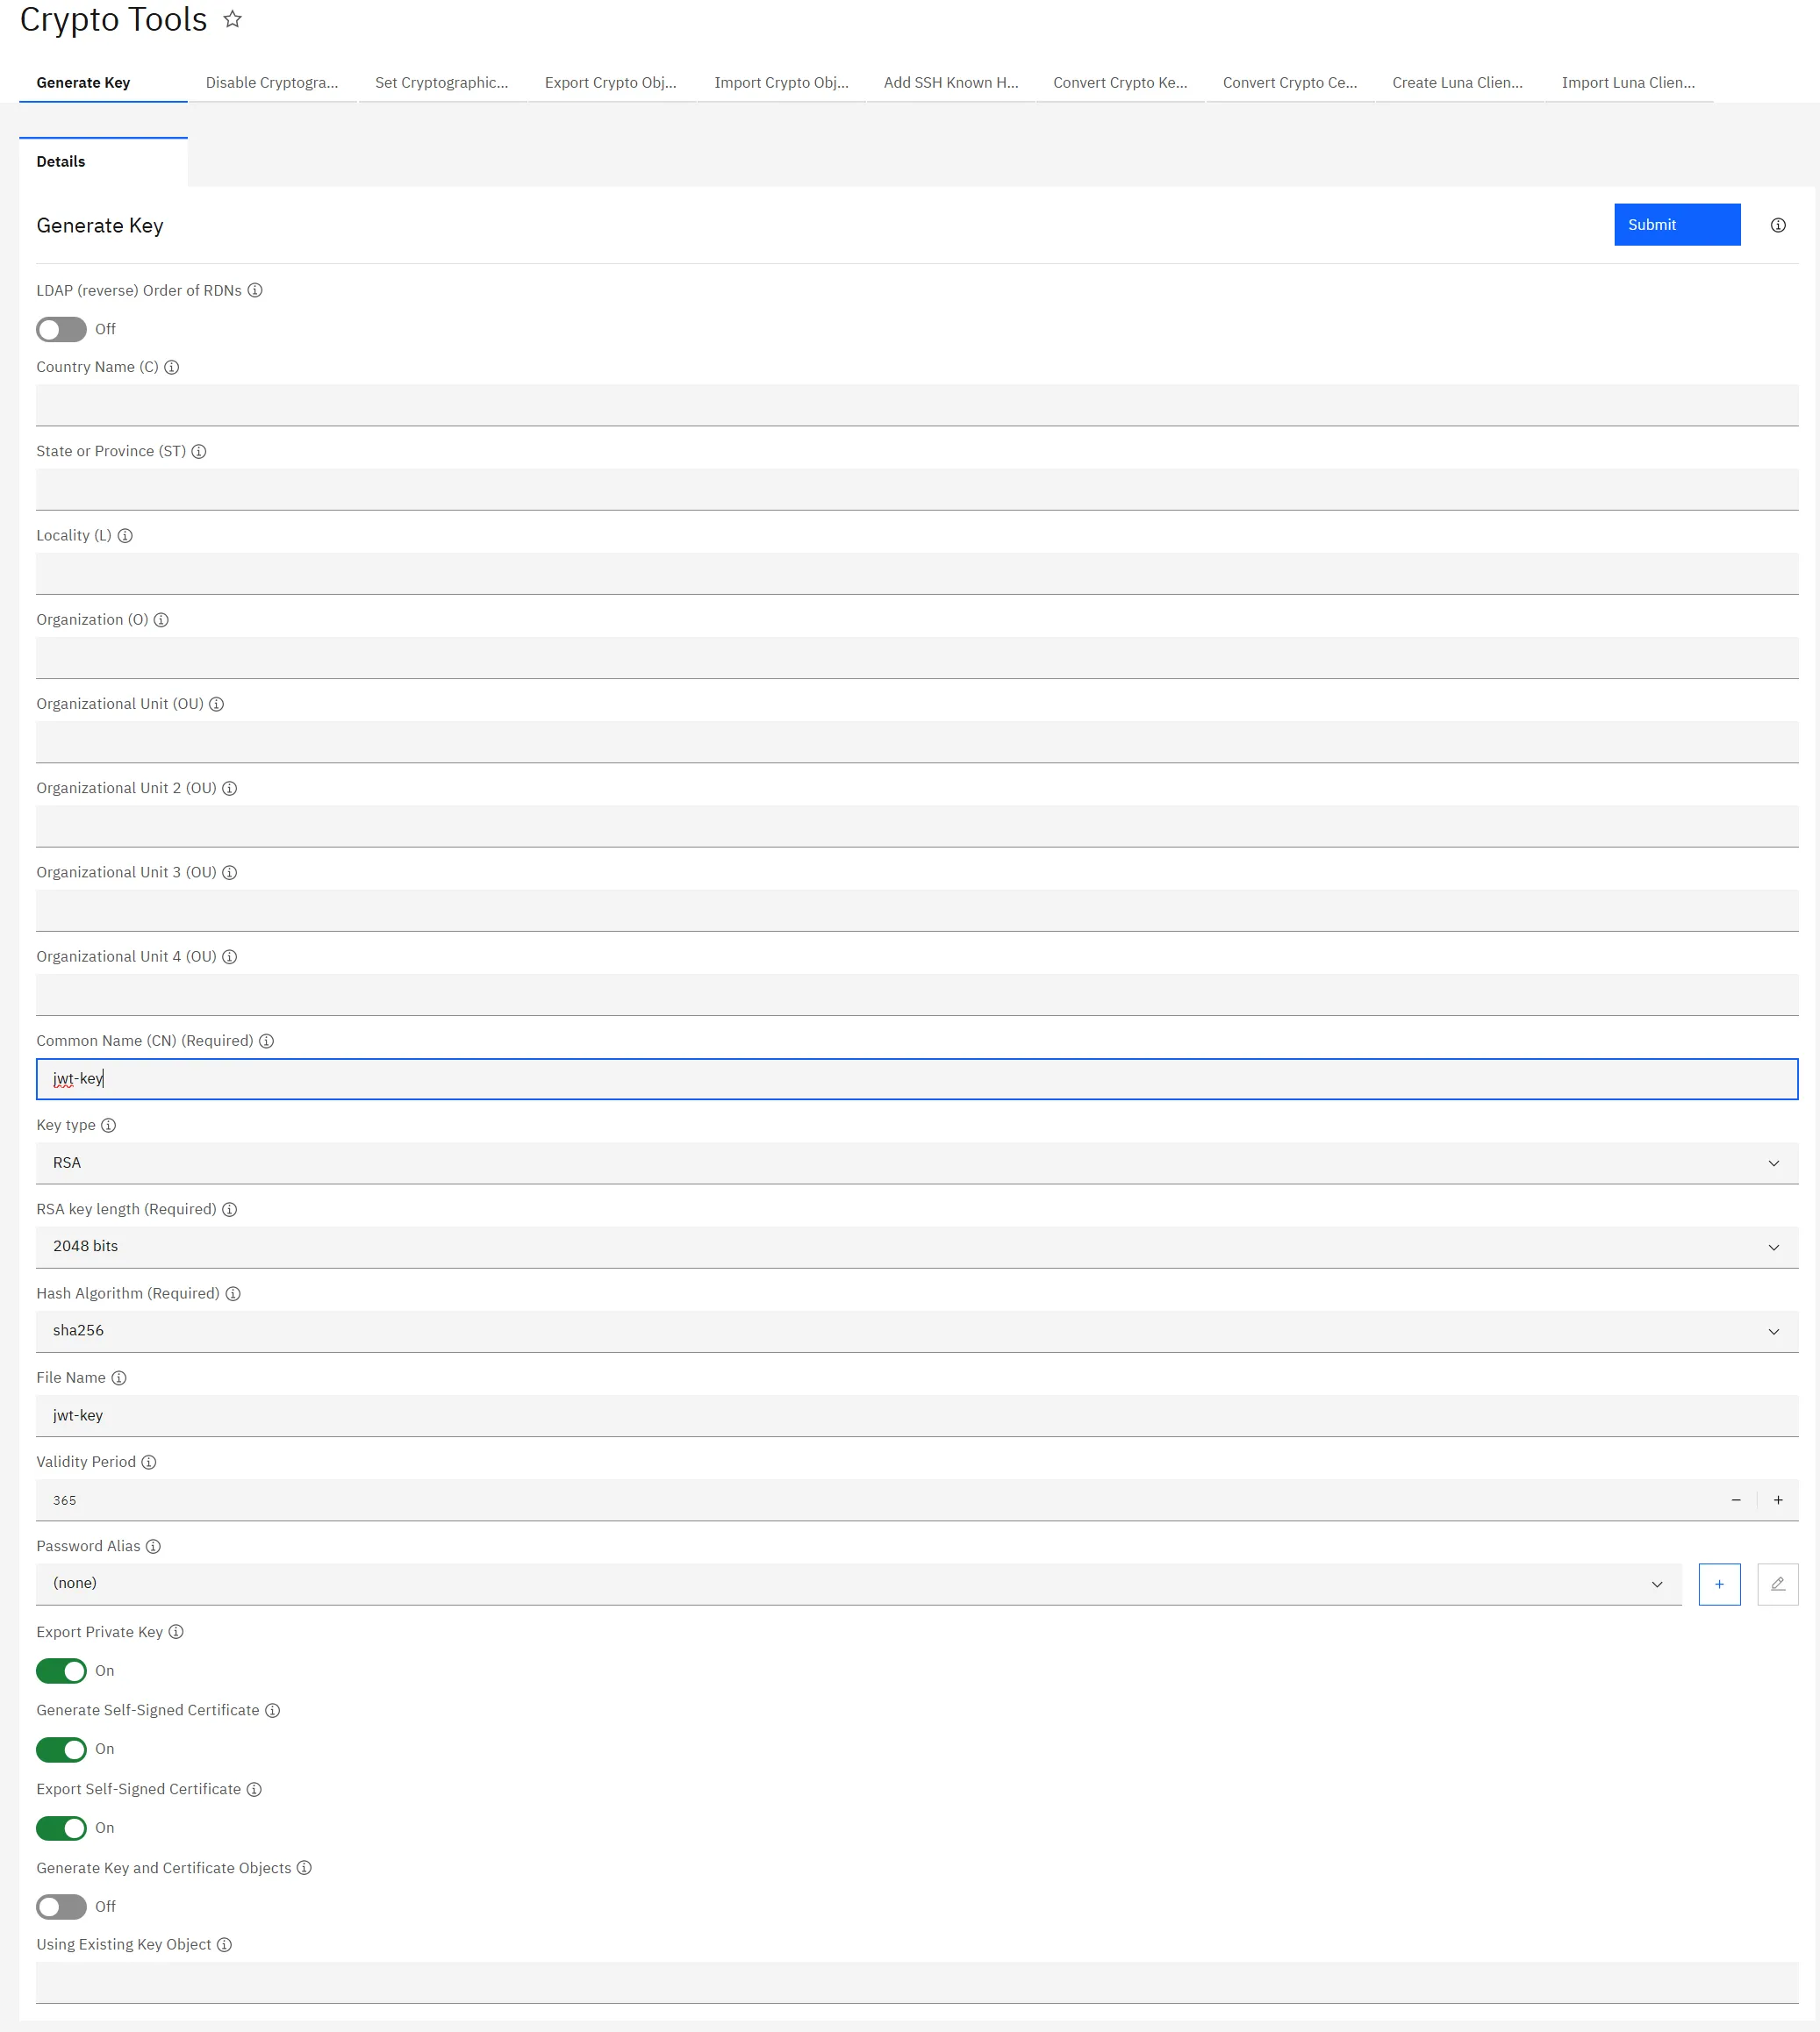
- Search for Crypto tools and fill out Common-Name (keeping other fields empty and rest setting to default). Click Submit.
- The certificates are stored in temporary folder. Download the public/private certificate.
Step 2: Upload the Certificate in APIC TLS Profile
- Go to api-manager-ui → Resources → TLS
- Create a new Keystore
JWT Keystoreand upload private and public key - Create a TLS Client Profile
JWT Keyprofileand select ‘JWT Keystore’ - Go to Manage → Catalog (I’m using Sandbox as my catalog here) → Catalog setting → TLS client profiles.
- Click Edit and select
JWT-Keyprofile
The aforementioned step will generate cryptographic certificate and key objects in DataPower (refer to the screenshot below). These will be utilized in the generation and validation of JWTs.
The file names are in following format:
private-key file: <apim-organization>_<catalog>_tlsp-<apim-tlsclientprofile>V<version>-key
public-cert file: <apim-organization>_<catalog>_tlsp-<apim-tlsclientprofile>V<version>-ca-<sequence number>
In my case,
- apim-organization :
personal - catalog:
sandbox - apim-clientprofile:
jwt-keyprofile(what we created in above steps) - version:
1.0.0(you can see this from api-manager ui) - cert sequence number: This should
0. The incremental is based on in case you add truststore file as well.
Read next Parts-2
— Keep Learning 😊
— Aditya Singh
If this article helped you in someway and want to support me, you can …


Comments powered by Disqus.